Monday, December 21, 2015

Christmas 2015

Welcome Back! Sorry to be gone so long but Christmas preparations bogged me down, plus I needed a card making break.

I'm back now with the November 2015 Paper Pumpkin. It was such a fun kit.

I was able to make 30 cards from this kit. The items I added are:
Whisper White card stock, extra Linen thread, Old Olive ink, and the pine bough stamp.

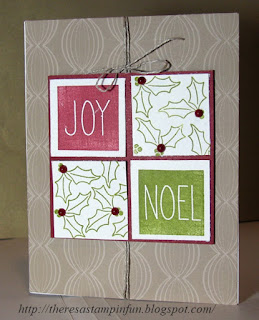
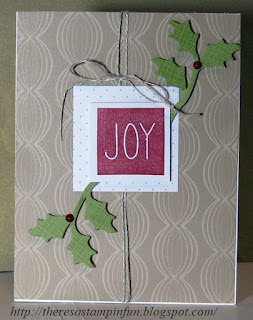
The first two cards are the ones made closest to package directions. Both cards have not as many pearls as suggested. The Joy card has one less holly sprig.

http://theresastampinfun.blogspot.com/http://theresastampinfun.blogspot.com/


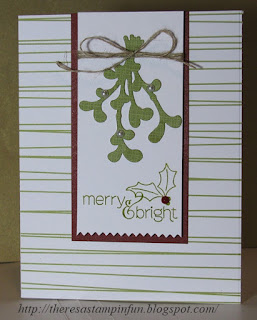
The next card is similar to the layout of the card above, but I didn't have anymore of the mistletoe. 
So I used a pine bough from an old Stampin' Up! set called Autumn Days. I stamped it in chocolate chip and outlined the pine with an old olive marker.
http://theresastampinfun.blogspot.com/


The next 2 cards are loosely based on cards I saw on Pinterest. I made the holly background paper with the enclosed stamp, I used extra old olive ink (which came in a previous paper pumpkin), and I used some of the extra red pearls.


With this card, and with the above one, I cut up the envelopes and used the cherry cobbler paper as backgrounds and the red striped paper comes from the inside of the envelopes.  (I just used white envelopes for mailing.)


I hope you enjoyed seeing my Christmas cards. One of them might be coming to a mailbox close to you soon.
But which one ???

Remember, if you need any extra stamping supplies, check out the links above to take you to the Stampin' Up! website. There are many great end of year deals. If you would like to start receiving paper pumpkin, the link is on the right.

Have a wonderful Christmas season.


Sunday, September 13, 2015

Falling into Autumn

I'm falling into autumn because the temps around here are getting cooler and all the acorns are falling from the trees. How appropriate that Stampin' Up! came out with the stamp set named 'Acorny Thank You' and matching punch.  I'm having so much fun playing with it.


http://theresastampinfun.blogspot.com/

This card uses some nice fall colors, which we'll be seeing around here in no time.

Ink colors are:
Mossy Meadow
Tangerine Tango
Early Espresso

The card stock I used was Very Vanilla, and Soft Suede.

Ribbon: Mossy Meadow striped


I entered this card into the Freshly Made Sketches Challenge #203. Following a sketch is a great place to start when making cards. Hop on over to Freshly Made Sketches to see all the beautiful cards others made using this sketch.

http://freshlymadesketches.blogspot.com/2015/09/freshly-made-sketches-203-sketch-by-jen.html


For all of you who are following my paper pumpkin posts, I'm a bit behind with them. I did add new pictures of July & August Paper Pumpkin samples. Check out the Paper Pumpkin Gallery. 

Remember, if you would like to join Paper Pumpkin, click the link on the right. If you need any Stampin' Up! supplies, the link to the store is at the top of the page.

Thanks for stopping by and looking.


Saturday, August 22, 2015

Friends Blog Hop

Hello Friends,

Today I'm participating in another Blog Hop from VCRocks. Today's theme for the Blog hop is "Celebrate Friendship".

What could be more special than telling your friends how much you love and appreciate them by giving them a beautiful hand made card?

My card design comes from a sketch from the "Stampin' gals gone wild" sketch challenge for the week of August 14th, but I was kind of late making this card, so I didn't post it there.

http://theresastampinfun.blogspot.com/
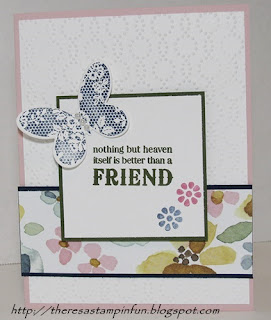
The stamp sets I used are Butterfly Basics, and Blessings from Heaven.

The cardstock I used is: Blushing Bride for the base, Whisper White, Mossy Meadow, and Night of Navy.

The Designer series paper is called English Garden.

I embossed the large white paper with an embossing folder called "Elegant Dots" from Stampin' Up!.

The butterfly is in Night of Navy ink, and I cut it out using a  framelit that matches the Butterfly Basics stamp set.

The only embellishment that I used was the small row of pearls on the butterfly body.

http://theresastampinfun.blogspot.com/


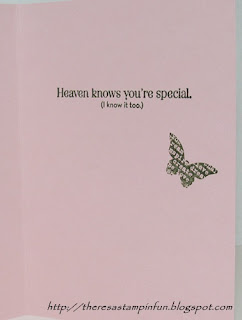
This is a snapshot of the inside of the card. It is stamped in the Mossy Meadow ink.


I hope you take time to appreciate your friends today, and tell them how much they mean to you.

Now , hop on over to VC Rocks and look at some more beautiful friendship cards.


Thursday, August 13, 2015

Catching Up!

Hi Friends,

Well, I'm way behind on my posts, so this blog is about catching up. Over the last couple months, I've been involved in some swaps. Now that they are finished, I wanted to share the cards that I made.


http://theresastampinfun.blogspot.com/

This swap was called the ABC Swap. Anything but a Card.

This is a self-closing Goodie Box.

After you had the basic design and measurements done, it was actually quite easy.


http://theresastampinfun.blogspot.com/


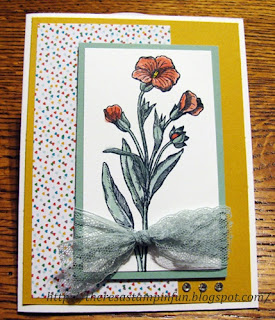
This card was for the Fantastic Florals swap.
I used some of the new in-colors from Stampin' Up!

The green paper and ribbon is called Mint Macaron and the red is Watermelon Wonder. 

The flower stamp is from Butterfly Basics. 


http://theresastampinfun.blogspot.com/

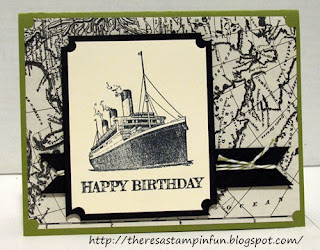
This swap was called the Manly Man Swap. We all always need 'guy' cards, and this was my submission. 

The stamp set is called 'Traveler', and the map background paper is designer paper from SU.  I CASE'd (copy and share everything) this card from a card in the Stampin' Up! catalog. 


So this summer, not only did I participate in swaps, but I had birthday cards and new baby cards to make. You can see them in the card gallery

Unfortunately, I haven't had time to share my Paper Pumpkin cards and alternatives with you, but take a peak at them on the Paper Pumpkin gallery.  I'm anxious to get August's PP. It will be here soon. 

How has your summer been going? Would you like to make some cards or find out what Paper Pumpkin is all about? Feel free to contact me. I'd love to help you.


Saturday, July 25, 2015

VC Rocks Blog Hop

Hi Stampers,

I've been busy with so many projects and just general things to do that I'm behind on my blog.

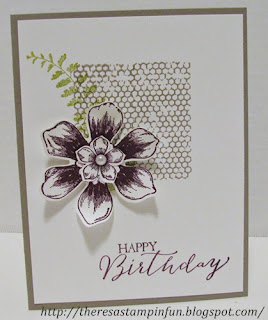
This week I join the blog hop from group I belong to named VC Rocks.  Here's the card I'm submitting for the challenge, "Celebrate Birthdays".

http://theresastampinfun.blogspot.com/

I really wanted to make a birthday card with this flower because the stamp and punch are both new to me.

The base of the card is the new Tip Top Taupe in color and so is the square section in the center.  The inside also has the same sentiment and a small fern.

Here are the items I used to make this card:


Stamps: Butterfly Basics, Beautiful Bunch, and Petite Petals
Paper: Whisper White and Tip Top Taupe
Inks: Tip Top Taupe, Blackberry Bliss, and  Old Olive
Punches: Petite Petals and Fun Flower
Embellishments: Large Basic Pearl


My inspiration came from the Techno Stamper, number 332.
Check back soon. I'll have pictures from June and July's Paper Pumpkin.

Hop on over to VC Rocks and see all the great cards submitted by other in the group.


Friday, June 26, 2015

New Things

Hi Stampers,

I'm sorry it's been such a long time since my last post. Wow! I looked back and it's been almost a month! I generally post around mid month with pictures made from my Paper Pumpkin, but mine came late, and then I was in the midst of making cards for swaps.

This is one of the swaps I'm involved in. Actually, it's a virtual swap because it's all on-line! It's called a Blog Hop.

The blog challenge was titled "CELEBRATE THE NEW".
The challenge was to use new Stampin' Up! products for our cards.
I was able to use almost all new products for my card, but I did have to fall back on the Painted Blooms Cotton Twine (whisper white) from the last Occasions catalog.

http://theresastampinfun.stampinup.net

Here is the 'recipe' to make this card:

Stamp Set:
Sprinkles of Life

Ink:
Tip Top Taupe
Watermelon Wonder

Designer Paper:
Cherry on Top 6 x 6 pack

Cardstock:
Crushed Curry
Early Espresso


Accessories: Whisper White cotton twine and Dazzling Details

I used the Watermelon Wonder and a blender pen to color the 2 side cupcakes, but the photo doesn't do the color justice. The color is brighter and pinker then as it appears. It's also hard to see, but I used the dazzling details on the flames of the candles. (I used a color pencil to color the flames.)

In a week or so, I'll post pictures of other cards that I made for other swaps, but first there is another new thing in my life. I have to (get to!) visit my newest granddaughter.

Enjoy all  the new things that are happening in your life and hop on over to the other blogs to see some more great cards!  Click here: VC Rocks! to connect to the blog hop.


Friday, May 29, 2015

Sketch challenge #188

It's time for another Freshly Made Sketch Challenge.
I find sketches are great place to start when you need a card.


http://theresastampinfun.blogspot.com/


For this card, I needed a birthday card for my sweet granddaughter who loves pink. (She is turning 4!)

I used the Cheerful Critters stamp set with Regal Rose, Rose Red, and Old Olive cardstock. For the flowers, I used the Petite Petals punch and the flower from Itty Bitty Accents Punch pack.

I extended the olive below the flowers because it reminds me of the grass. I added dazzling details to the center of the flowers. I thought about adding texture to the pink background, but decided against it.


Here is the sketch that I based the card on.

http://theresastampinfun.blogspot.com/


Inspiration comes from many places. In my case, I needed a birthday card, I knew she loves pink, and Freshly Made Sketches posted this sketch. Everything I needed to make a special card for my granddaughter.

Where do you find your inspiration?


Sunday, May 24, 2015

May Paper Pumpkin and a Tale of Two Cards

May Paper Pumpkin is here! It's such a cute set. You can make 6 cards and 4 gift bags.
Here's the card and bag I made according to the package directions.

http://theresastampinfun.blogspot.com/


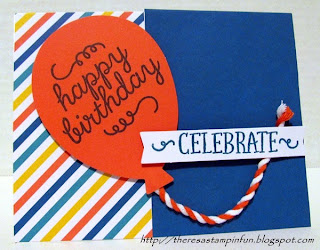
Here are a couple of alternative cards that I made.

http://theresastampinfun.blogspot.com/


This card I made by cutting the front and back of the card apart. I then cut the striped section at 2 1/2 and the blue section at 3 inches.

I attached the balloon string with glue dots.

http://theresastampinfun.blogspot.com/


This card uses a 1 1/2 inch strip of the striped paper,and the belly band from the bag, along with a tag.


And now: A Tale of Two Cards

http://theresastampinfun.blogspot.com/
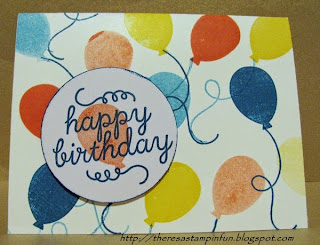
This card struggled to come into being. I wanted to have Calypso Coral balloons too, but it was nowhere to be found. I thought to myself, "I thought for sure I have that color." But I looked and looked, and no Calypso Coral.

So, I used the Island Indigo from this kit and Daffodil Delight from a previous paper pumpkin kit. I decided that a blue and yellow card should look ok.


Along the way, there was a smudge on the yellow balloon (conveniently covered up with the little blue heart) and a another smudge along the top left. I added a part of another blue balloon, making it look like it was there all the time. In card making, you have to improvise!

Well, the time came to photograph the card, so I had to tidy up my craft table. Low and behold, under some papers, what did I find?? Yes, it was the Calypso Coral ink !!!

It was back to the craft table, and start another card. Just like the card above, but with coral balloons.

http://theresastampinfun.blogspot.com/


I think it does look better with the 3rd color.


I hope you are inspired to create! Don't get too frustrated when stuff happens. It is just paper after all!

If you don't receive paper pumpkin yet, click on the link on the right, and join the fun! A special promotion until June 10. Get 2 months of paper pumpkin for the price of one!


Sunday, May 17, 2015

Sketch Challenge

Hi Stampers,

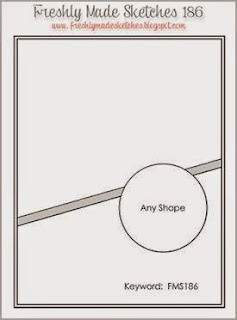
Today is something new for me, but something I've wanted to do for awhile. That is, to enter challenges from other websites or blogs. I'm submitting this card to the Freshly Made Sketches challenge #186.

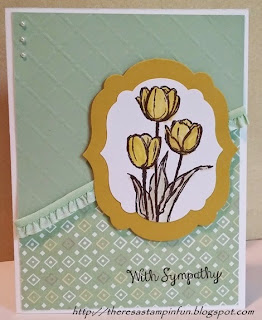
Unfortunately, I needed a sympathy card, and this sketch worked beautifully.

http://theresastampinfun.blogspot.com/


This card uses the Pistachio Pudding, and Summer Starfruit card stock, and pistachio pudding stretch ruffle ribbon.

The Designer Series Paper is called Sweet Sorbet.

The Tulip stamp set is called Blessed Easter. I added 3 little pearls under the sentiment.


Here is the sketch:
http://theresastampinfun.blogspot.com/


The card below is a reverse order of the same card. I had to try it out to see which one I liked better.

http://theresastampinfun.blogspot.com/


Which one do you like better? I'd love to hear your comments.


Tuesday, April 28, 2015

April 15 Paper Pumpkin

The April Paper Pumpkin is here and it's soooo cute!

theresastampinfun.blogspot.com


This kit contains enough supplies to make 8 cards. The stamps are so versatile, you could make almost any saying that you would like.


They are perfect for Mother's Day and Father's Day.


theresastampinfun.blogspot.com
These cards are made according to package directions. It's such a cute Father's day card.
(Did I mention that I love this set?)

theresastampinfun.blogspot.com

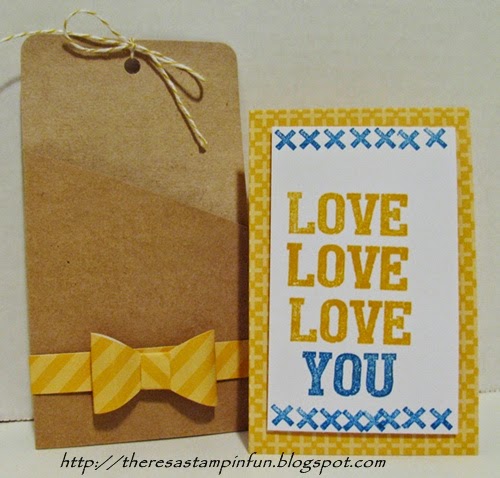
These cards are alternatives that I made with the supplies in the kit, and all I added was a piece of white cardstock. The left card is the blue card cut in half and adding the yellow bow.
The right card's tan background is from the pocket and decorated with the little x's. The yellow background is the yellow card cut in half.

If you cut all the colored cards in half, you could make 16 cards! All you need is some extra white cardstock for the center and to create the card.

I hope that you are enjoying your paper pumpkins. If you have any questions or help, don't hesitate to contact me.

P.S. I added new cards to the Card Gallery. Check them out!


Tuesday, April 21, 2015

So Much Happening!

Hi Friends,

There is so much happening in the Stampin'  Up! world that I had to quick let you know!

Our Retired list is now available!

Because of this I'm going to be having a "Saying GoodBye Party". Please come and make a couple of cards featuring some of the retired sets. 

Here's a little video highlighting some of the items that will be leaving. Be sure not to wait too long because I think they'll go fast!


My party will be at my house on Saturday, May16th at10:00 AM until Noon. Don't be late!

(Besides this, the new Paper Pumpkin will be here soon! I'm so excited I can hardly stand it!)

Check out some of the cards made with some of the retires sets on Pinterest.

See you then.


Sunday, March 22, 2015

March 15 Paper Pumpkin

March's Paper Pumpkin brought us a kit that you could make invitations, thank you's or birthday cards. 9 cards with envelopes if made as instructed.

The kit comes with basic yellow embroidery floss and you stitch the 'YOU' with a backstitch.
(if you're familiar with embroidery stitches)

theresastampinfun.blogspot.com


These two cards are created the way you are instructed. Can you see the difference?
The first card is made with the 3 strands of embroidery floss, and the second card is stitched using 6 strands.


*TIP* Thread the needle using the same method when threading a darning needle or use a needle threader or shuttle. (It's a little challenging threading the needle with the floss.)


theresastampinfun.blogspot.com


Here are some alternate cards using this kit. I used a marker or pen to connect my dots instead of doing the stitching.
I felt the stitching was a little time consuming, and I was looking for a different look.


theresastampinfun.blogspot.com


theresastampinfun.blogspot.com

This one I cut the card in half, using just one side, and backed it with pool part card stock. I used the little triangles to make a banner.

If you did this, you could get more cards than nine cards.


Let your imagination run wild and see how many different designs you can come up with.
It takes practice, but the more you do it, the more creative you will feel and be.


Februry Paper Pumpkin

I was on vacation a week ago, so I'm late in posting about the newest paper pumpkins.
February and March are both great kits!

February's kit contained Thank You notes that you could put in little boxes.  
theresastampinfun.blogspot.com


theresastampinfun.blogspot.com


This is what is inside of the left box.
8 panels that you can stamp and add the orange letters.The last panel is blank for you to write on.


theresastampinfun.blogspot.com


Here is what is inside the right box. I cut the 8 panels into 4 small cards. I put them into the box. This would make such a cute little gift or 4 little Thank You cards for you to use.
theresastampinfun.blogspot.com

This card uses a long, skinny piece of white card stock with stamped lines for the background. I put the left over orange felt on top and added 3 dots on the side. It's a little crazy, but I was experimenting.


I have a lot of fun with my paper pumpkin kits. It was extra fun this month because I was able to make the kit with my daughter in Florida.  I hope you all have fun making and trying new ideas with your paper pumpkins. If you don't get the paper pumpkin, it's easy to subscribe. Just click the button on the right.

Tuesday, March 3, 2015

Saturday Workday

Last Saturday, we had a workday at my church. You could bring your projects, spread out your stuff on the big tables, and work on them without interruptions from your husband or children. Here are a few of the projects I worked on.

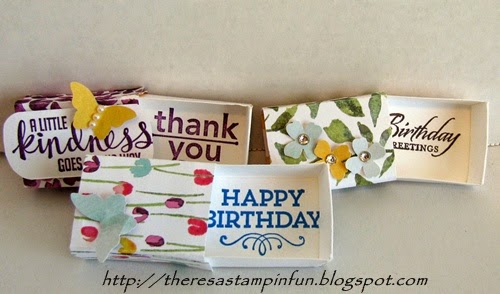
The first project was making these little matchboxes. On the Simplicity blog, she had a tutorial on how to make these. They were so cute, I just had to try it for myself.

One tip I would add would be that when you do the cover, measure it around your box. You may need to loosen it a bit.

http://theresastampinfun.blogspot.com/
Matchboxes Closed

http://theresastampinfun.blogspot.com/
Matchboxes Open


The next project was this set of Thank You note cards. I used the prepackaged note cards from Stampin' Up! They come in a package of 20 pre-cut cards with envelopes. This made the project easy.  To see closeups of the thank you cards, check out the card gallery.


http://theresastampinfun.blogspot.com/


The stamp sets are from Stampin' Up! They are:
  • Wetlands
  • Bloom with Hope
  • Work of Art
  • Kinda Ecletic
  • Bordering Blooms
  • Blessed Easter (retired)


As always, check out the weekly deals and if you would like to purchase any Stampin' Up! products, use the My Stampin' Up! Store link above.


Monday, February 2, 2015

One Trick Pony

Well, just so you're not thinking that I'm a one trick pony and that I can only do cards, I do make a few other things.

Behold, the lowly, empty juice container.


Transformed into a cute, handy pencil or marker container!

theresastampinfun.blogspot.comClosed theresastampinfun.blogspot.com
Open with markers inside

I used Designer Series Paper from Stampin' Up! named Sweet Sorbet as the background and the coordinating stamp set to add a few flowers and the border. This little craft came at a good time because my other marker holder was packed and couldn't hold anymore!

I also made some little treat bags with the January Paper Pumpkin. The January kit came just in time for Valentine's Day. It's a really cute kit. If you would like to start receiving the paper pumpkin, just click the link on the right!

theresastampinfun.blogspot.com


Sunday, January 18, 2015

December Paper Pumpkin

Greetings, Paper Pumpkin subscribers and others.
Today's cards are made using the extras from the December 2014 Paper Pumpkin kit.

I made a couple of cards using just the extras in the kit and a piece of white cardstock. 

theresastampinfun.blogspot.com


This card uses the negatives of the happy birthday and the star confetti strips. I used a corner rounder punch and some of the extra sequins to accent it. 
theresastampinfun.blogspot.com


My Hello card is similar to the top one only with a little different arrangement.


theresastampinfun.blogspot.com


The white section of this card is mounted on a piece of Pistachio Pudding cardstock, which is the color of the envelopes that came with the kit.

The Happy Birthday background is one of the stamps that came in the kit.

theresastampinfun.blogspot.com


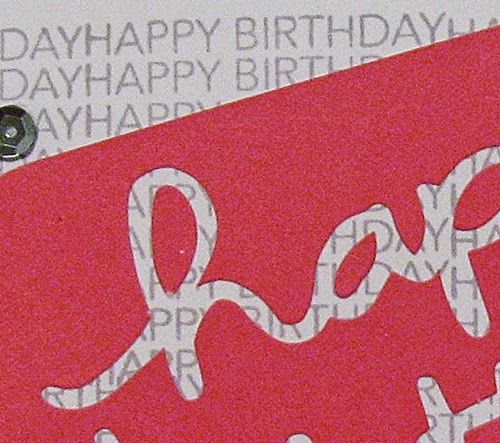
Here is a detail shot of the Happy Birthday stamp background and how it shows through the pink section.


Out of the December kit, I was able to make 12 cards so far. I hope you enjoy you paper pumpkin as much as I have. Soon January's kit will be here, and I can't wait to see what is in it.

Stampin' Up! has a great deal on a 3 month pre-paid subscription on paper pumpkins. Be sure to check it out! Contact me for more details. I love to hear from you.